Getting Started with RooShare
Rooshare is a file-sending application. It zips large files and sends it to the receiver. The zipped files are also password protected. This is a very easy way of sending files to anyone. Currently the application is close ended and users must have an account to send or receive any files.
Dashboard for Administrator Accounts
Administrators in Rooshare product have a dashboard which gives them critical information about users, files being transferred and the storage being used.
Below is an example of an Admin Dashboard
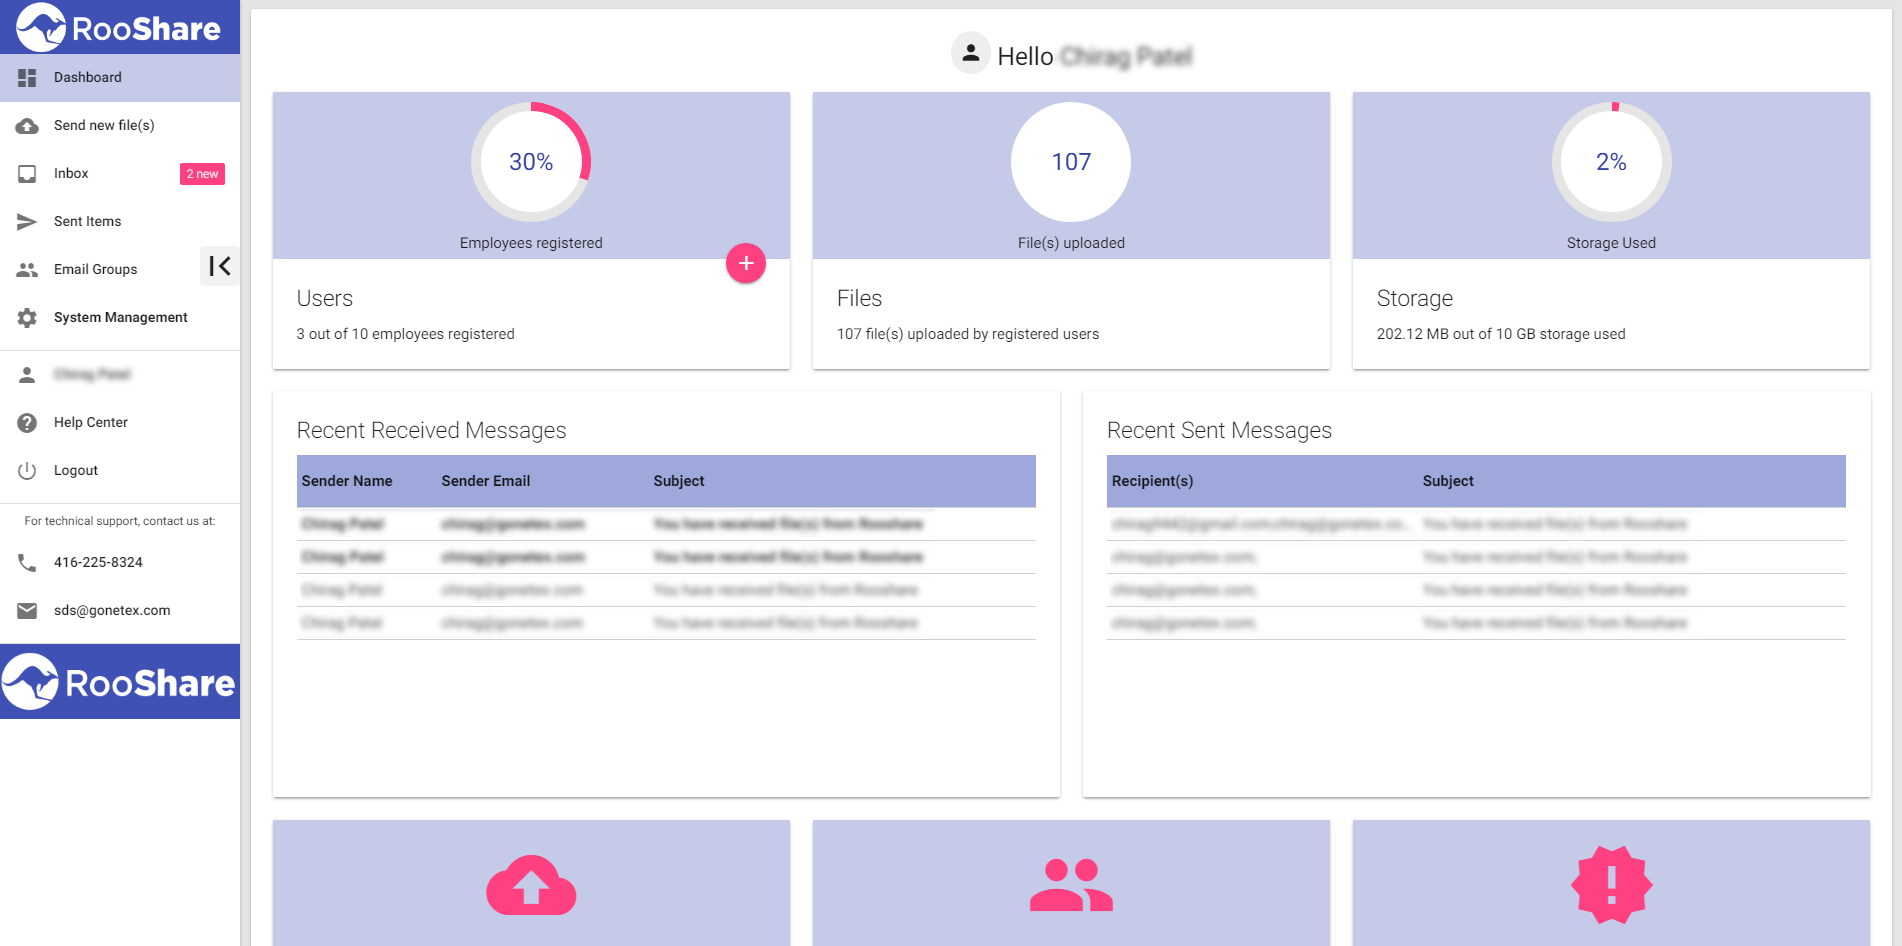
On the left side is the nav-bar or the menu through which the user can navigate through the product pages and elements. The menu is collapsible. It can be collapsed by clicking on the arrow button pointing left.
In the Dashboard, the Admin can see three information tabs:
- The number of current users registered.
- The number of files downloaded across the company.
- The total storage being used by the company.
The row below shows the recent received and sent messages. These two tables show messages that came in or was sent within a week. Any messages older than a week are not shown in these 2 tables.
In the next row, we have three tabs which allows the user to Send New files, create a new group and a section which shows the recent changes or developments done by the RooShare team for the RooShare product.
Dashboard for Employee Accounts
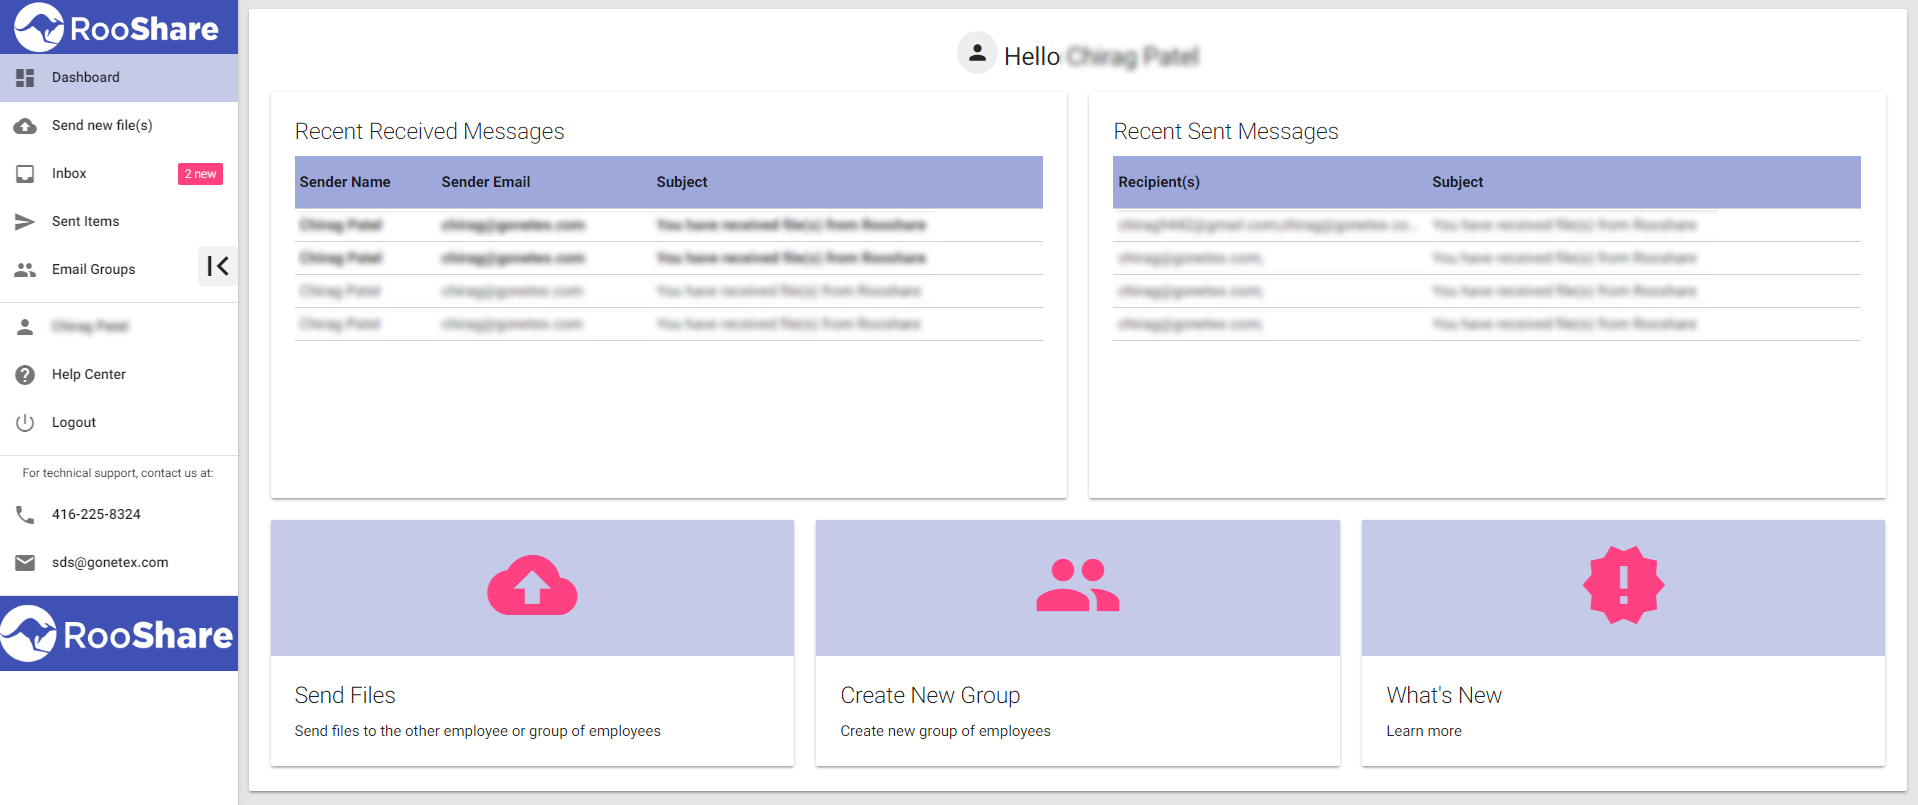
Employee accounts have similar dashboard as Admins but they don’t see the information about users, number of files transferred and the storage being used by the company.
In this Dashboard, the recent received and sent messages are shown and below that there are tabs for sending files, creating new groups and the What’s New section.
Below is the screenshot of how the employee account dashboard would look like:
Send a New File
In this section a user can send a file to any registered user in RooShare.
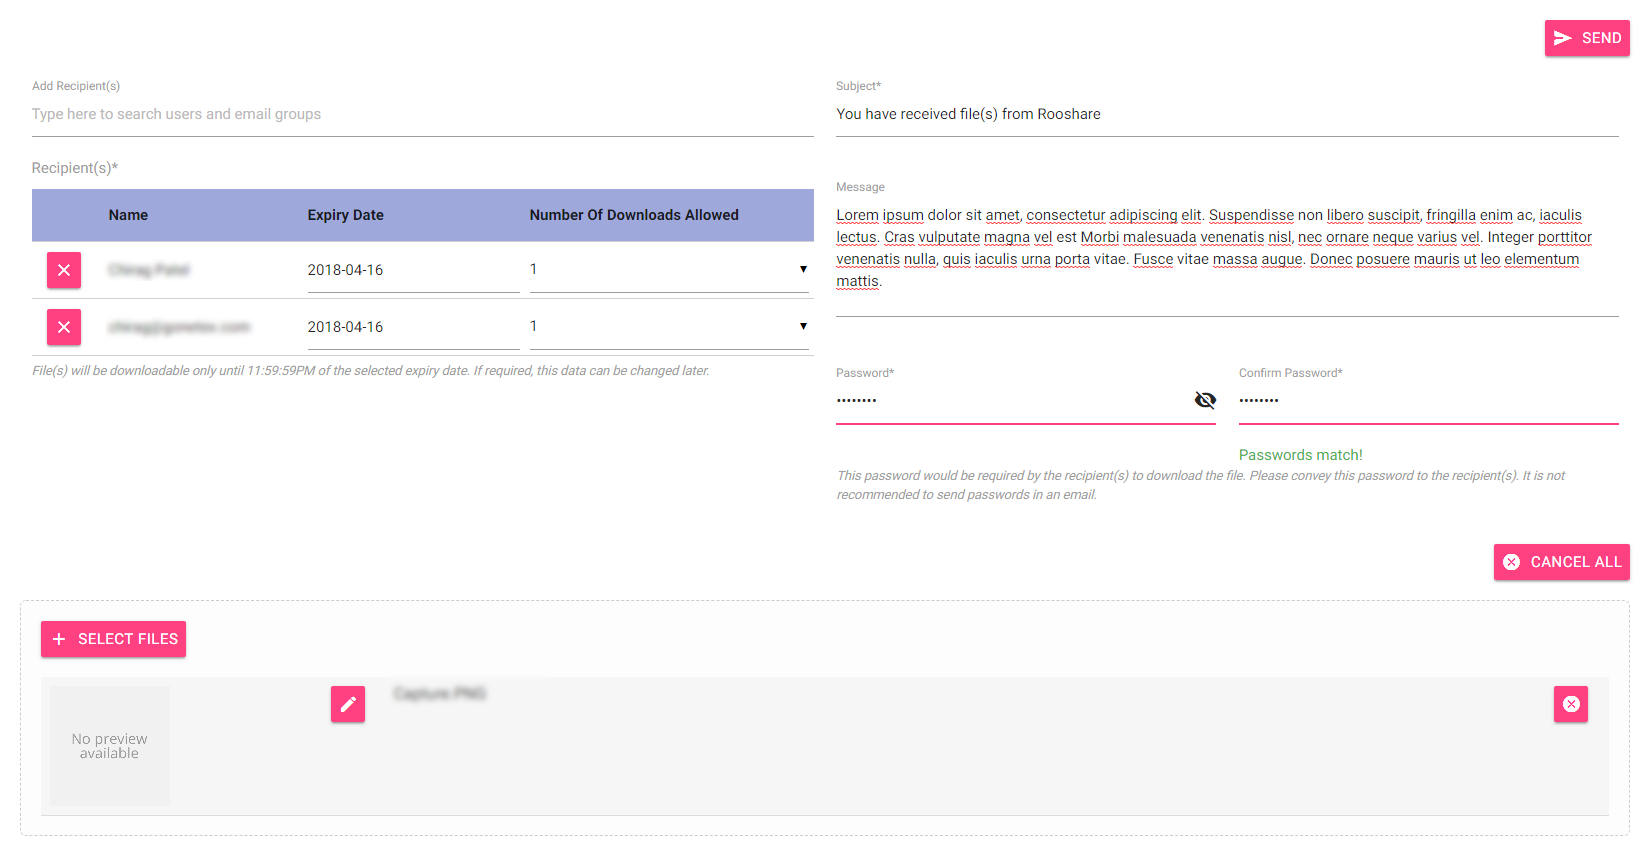

User can Add Recipients in the first text box. While inputting the recipient’s name, a dropdown with names of registered users would show up and the user can choose a recipient. User can add as many recipients as needed.
NOTE: The user cannot add himself/herself as a recipient. One recipient cannot be added twice.
Once the recipient is added, there will be “expiry date” and “number of downloads allowed” for each recipient. The expiry date is for the file(s) being sent and can be customized for each recipient. The same principal applies for “number of downloads”, it can be customized for each user.
The Subject line is always defaulted to “You have received files from Rooshare” but the user can change it at any time and replace it with a subject of his/her choice.
To send files through Rooshare, they must be locked by a password. The user must enter the password and enter it a second time in the “Confirm Password” field. This password should be conveyed by the Sender to the Receiver through some arrangement as Rooshare doesn’t send the password to the recipient through email communication.
In the Message section, the user can write the message body or something which the Sender wants to convey to the Recipient.
User has the option to choose when the file expires and how many total downloads are allowed for the particular file or set of files. Currently the number of downloads refers to the number of downloads for each recipient, on the particular file or set of files.
At the bottom the user has the option to “Select Files” or can drag and drop the files in the box specified.
After completing everything, click on Send button.
NOTE: After hitting the Send button, in the backend, the file(s) are zipped and compressed and then sent to the recipient. There might be a slight delay for receiving the file on recipient’s end. The recipient will be notified by email on receiving the file from the Sender.
Inbox Section
- On receiving a file through Rooshare, the files are stored in
- On the left hand side, it shows the list of messages sent by other users.
- On the right hand side, the message detail is shown.
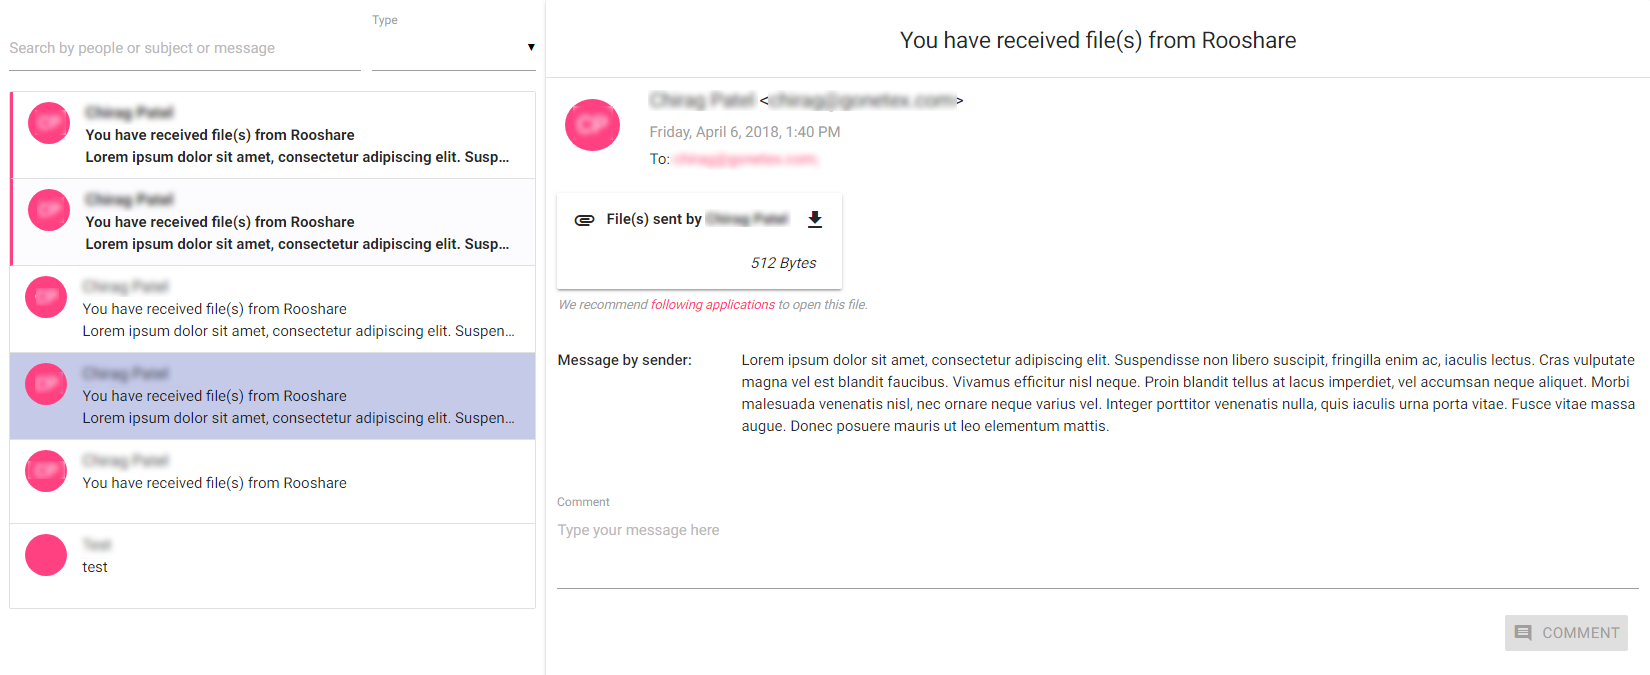
- The user can download the file by clicking on the file which would look something similar to the one below:
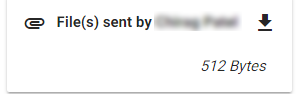
- On the file itself it shows the number of total downloads left for the file(s).
- Users can also comment on a particular message by typing in the comment box and submitting the comment by clicking on “Add Comment” button.

- Once a comment is submitted, an email notification is sent to the owner of the message.
- The file/message expiry date is also shown in the message detail section.
- After the expiry date the file/message cannot be downloaded and there is no way to extend the validity period. After the expiry the message is moved to the Archive section.

Sent Items Section
- This contains all the messages sent from an account.
- It has the same layout as the Inbox section
- The Sender has the option of extending the validity of the file or the Number of downloads allowed, in this particular section.
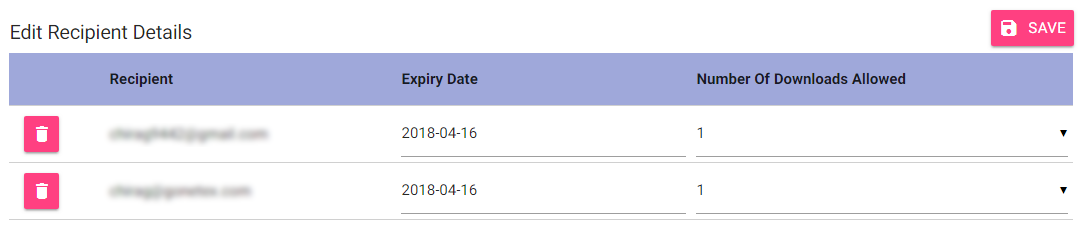
- In the message details section, the user will see a dialog box like the above.
- In this box, the user can change the Expiry Date of the file/message and the number of downloads allowed for this particular file.
- NOTE: The number of downloads is for each user. For Example: If the number of recipients is 2
and the number of downloads is specified as 1, then each person will be able to
download the file once. - NOTE: The expiry date of a file/message can be extended to a maximum of 1 month from the
original sent date.
Email Groups Section
- In this section, email groups can be created.
- Groups can be created by any registered user. All the groups are visible to everyone. But only the creator of the group can edit the group details.
- On clicking the Email Groups, user will see a list of all the current groups in the system.

- To create a new group, the user can click on the
 icon at the bottom right hand corner.
 - A window would appear to create a new group.

- The user has to name the group.
- User can select the registered users who are supposed to be in the group.
- Users can also search for a user based on first or last name or the registered email address.
- Once everything is chosen, click on the SAVE button to save the group.
- NOTE: All users can see the groups created but only the Owner of the group can edit the details
of the group.
System Management Section (only visible to Administrators)
Access Control
- This is the first sub-section of System Management section
- In this section, the Administrators can create user roles. By default, the full System Management section is visible only to Administrators.
- To create a new user role, click on the icon at the bottom right hand corner.
- A window would appear with all the permission options.
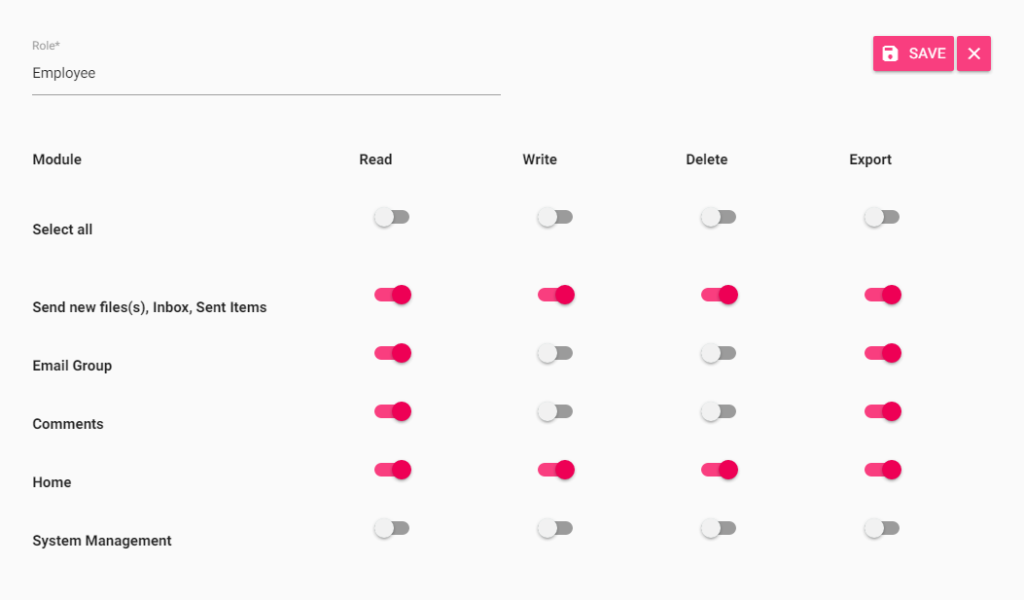
- User can select the permission of Read, Write, Delete or Export from each of the modules.
- According to the requirement, Admin can switch on or off any permission option.
- After choosing all the required option click on Save button to save the user role.
- User roles can be assigned while creating a new user.

All Messages
- The Administrator can see all the messages being sent through the Rooshare system.
- This section shows all the messages being transferred across the company.
- The Administrators can edit the expiry date and number of downloads for a particular file from this section.
Sessions
- This section shows the sessions of all users using the system.
- If gives information about their Login Time, IP information and the Expiry time of their session.
Users
- Shows the list of registered users in the system.
- The list of users can be searched by using the dynamic search box on the top and can also be refined according to the user role.
- To create a new user, click on icon at the bottom right hand corner.
- On the New User form, the field information that are mandatory are First and Last Name, Email Address, Role, Password and Confirm Password fields.
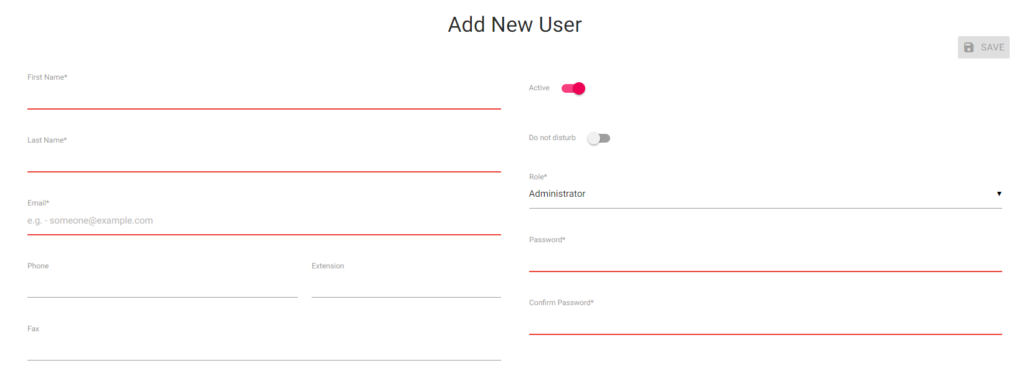
- Until all the mandatory fields are filled up, the “SAVE” button will be disabled.
- Once a new user is created, a welcome email is sent to the new user in their registered email address.
- NOTE: The Administrator needs to notify the new user regarding their account
password as Rooshare system does not send the password through emails.

Company Settings
- This section will be pre-populated while your company account is created.
- If some field is not populated, it is advised to fill up those fields.
- The company Admin is also advised to upload the company logo in the logo upload section.
Activity Log
- This section shows the activity of each user across the company.
- It shows the user name, information about the activity and at what time the activity was initiated.